Ensure your design transfers accurately to the press. Read through the guide to learn how different aspects of your document can change the printing process, or jump to a specific topic by clicking on it.
Document, Canvas, Artboard, and Page Size… These terms all refer to how you set up your print project on the computer. It determines where your document will trim during production and where your trim lines will show on screen. (Trim lines are black guide lines)
Trim Size and Folded Size… These refer to what size the actual printed product will be. This is after the print has been trimmed and/or folded. It depends on the right document size and bleed settings.
Setting Up Document Size in Indesign & Illustrator
During File Setup always make your Document Size equal to what size you want your final print to be (Trim Size). Example: To design an 8.5″x11″ letterhead in Illustrator, make your document 8.5″x11″.
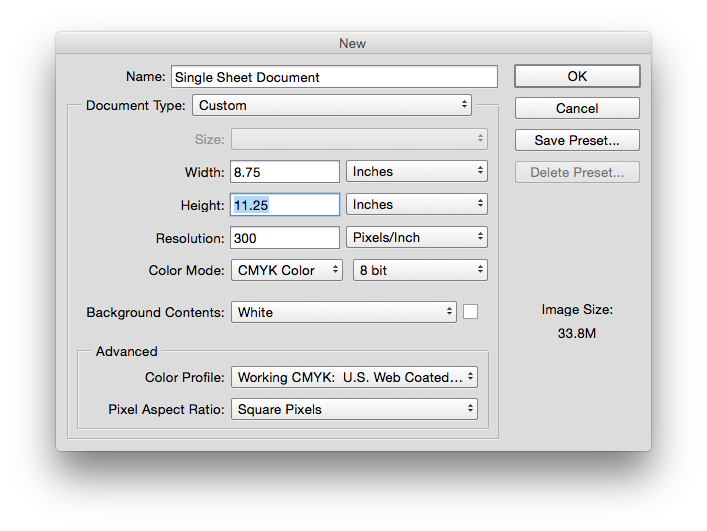
Setting Up Document Size in Photoshop
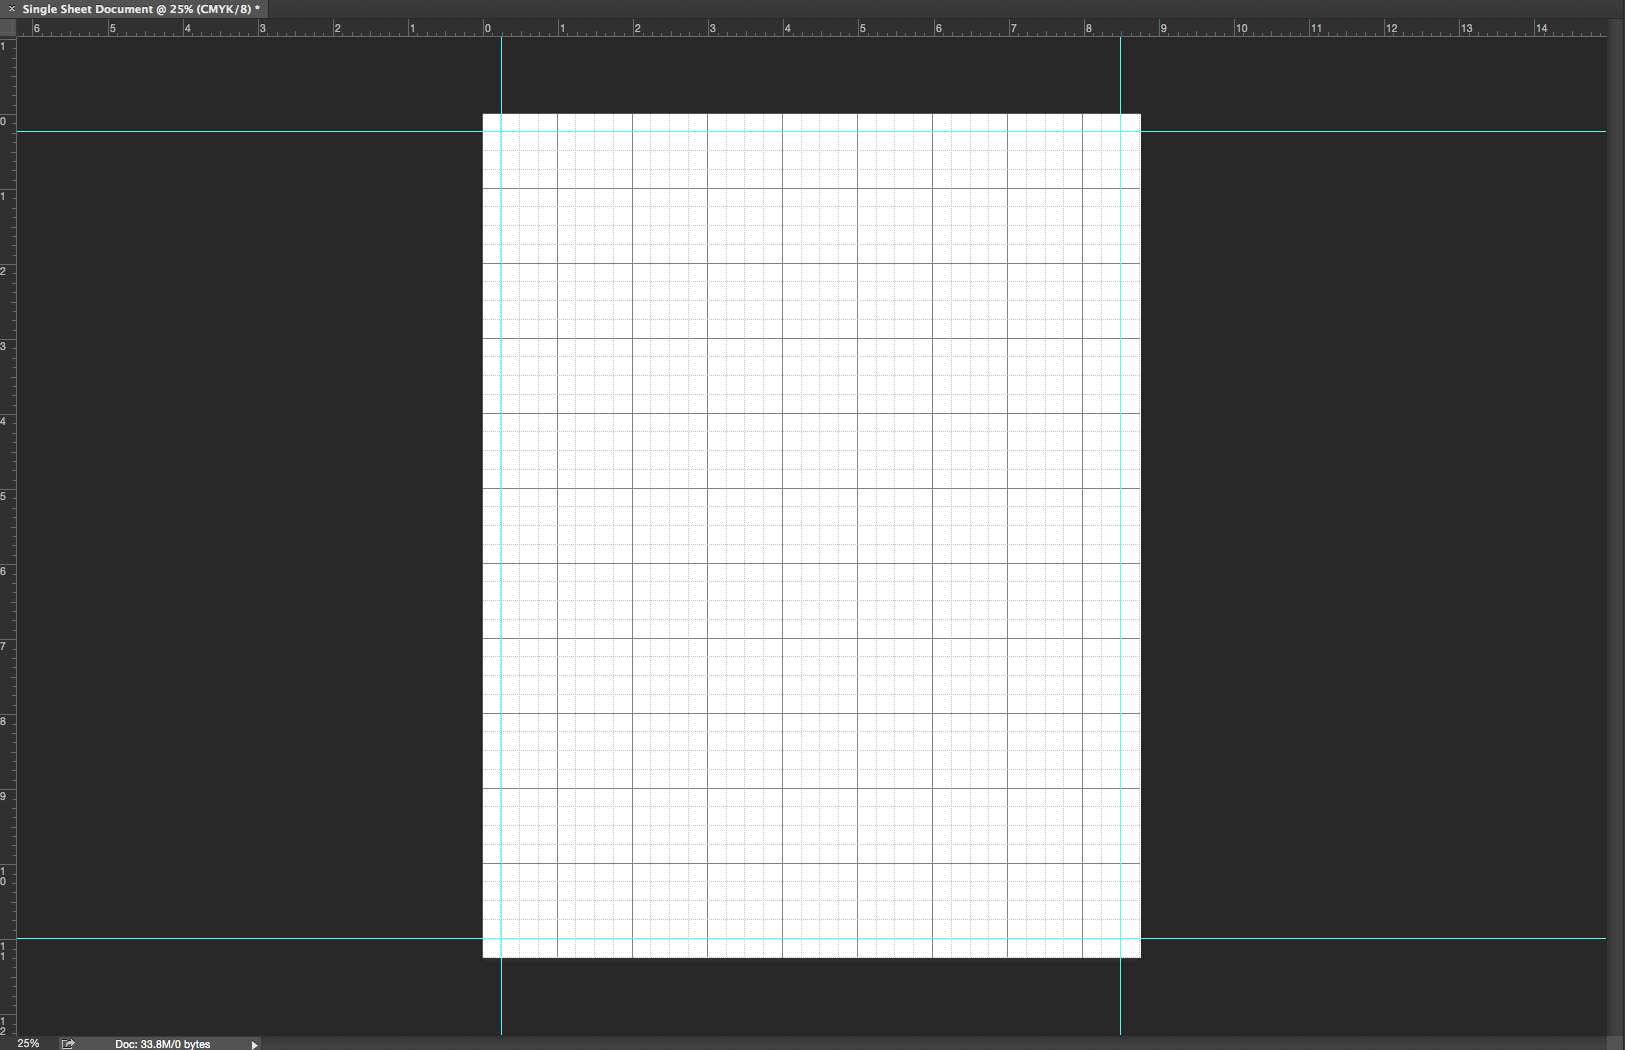
Make your Document Size equal to the final Trim Size + Bleed. We require .125″ of bleed per side. Add .25″ to the width and height. Use guides to mark where the document will trim as you design. When exporting make sure to save a photoshop pdf with bleed or use our SG High Res preset.
Example: To design an 8.5″x11″ Letterhead in Photoshop, make your document 8.75″x11.25″
2. Bleed
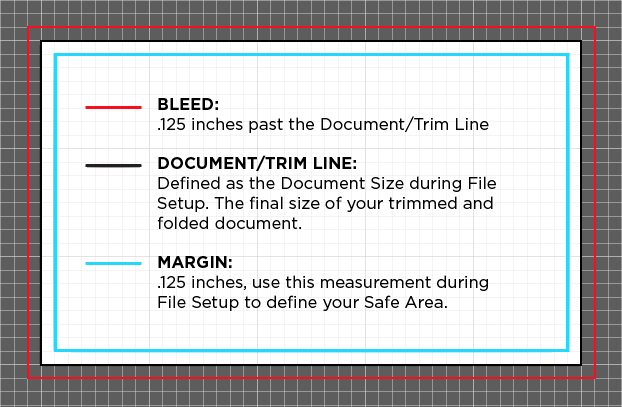
To make sure that your document is printed correctly, we require the design to extend an ⅛ inch beyond the trim line. The extra space is called the bleed area. “Adding bleed” protects the document from small misalignments, paper creep, and undesired white space.
When designing a new document, set up your bleed area in the New Document dialog box. Also check that the document has appropriate bleed when exporting your PDF to us. If the final PDF lacks proper bleed settings, your file may be returned to you.
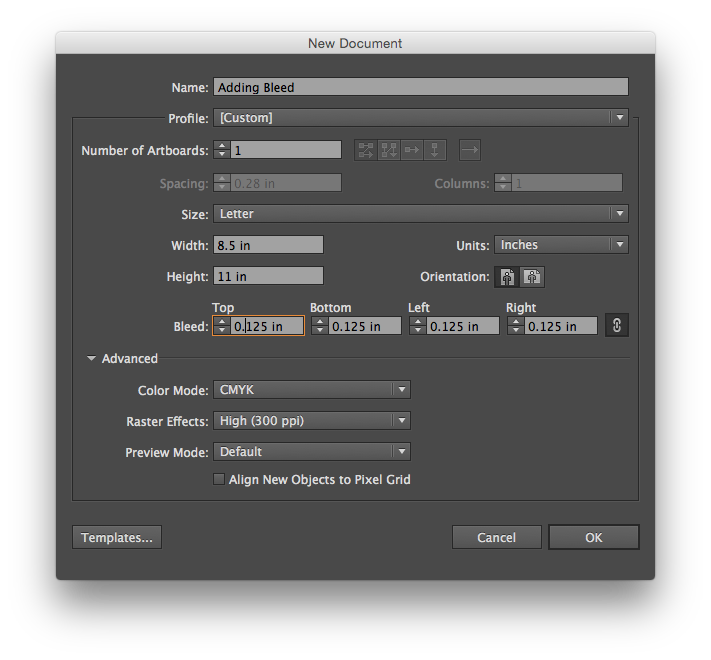
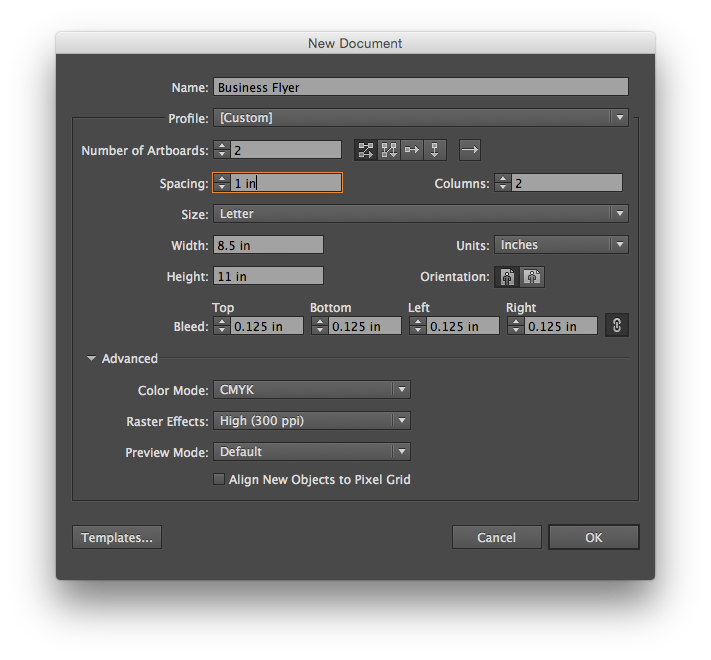
Adding Bleed in Illustrator
Go to File > New
Name your print design something appropriate
Select "inches" from the Units drop down menu
Enter the final width and height you would like your piece to be
Beside Bleed add 1/8 inch (.125 in) to each side of the document
Select CMYK for the Color Mode
Select High (300 ppi) from the Raster Effects dropdown menu
Press Okay
The bleed area is between the black and red lines.
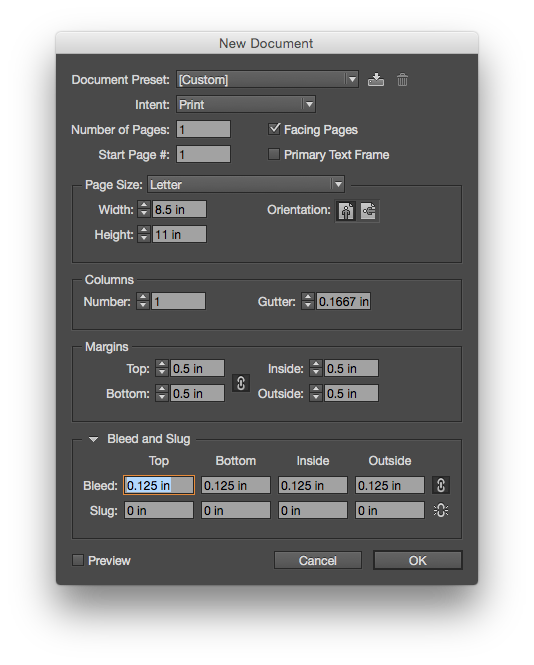
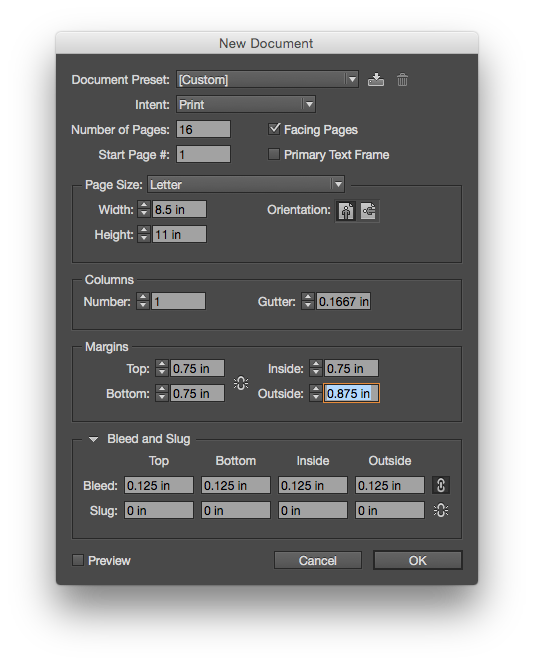
Adding Bleed in InDesign
Go to File > New
Enter your desired number of pages
Enter the Width and Height of your Finished Folded Document
Add your desired amount of Margin (We recommend at least .125 inches
Enter .125 inches (1/8 inch) Bleed for all four sides
Press Okay
The bleed area is between the black and red lines.
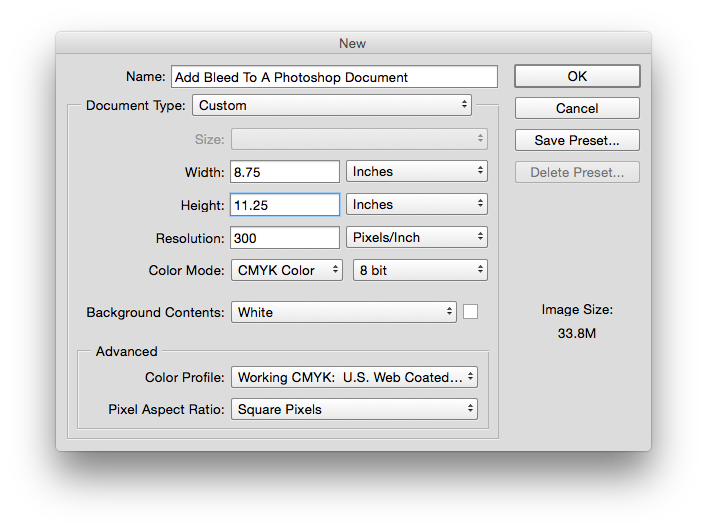
Adding Bleed in Photoshop
Go to File > New
Name your Document
Width: Enter the Width of the Final Size + .25 inches
Height: Enter the Height of the Final Size + .25 inches
300 Resolution
Select CMYK Color for the Color Mode
Press Okay
Using Guides, mark .125 inches (1/8 inch) on each side of your document to mark where the document will be trimmed
Example: To design an 8.5" x 11" Letterhead in Photoshop, make your document 8.75" x 11.25"
3. Margins
A Margin is a white or blank space between the main content and the top, bottom and edges of the page. During the printing process adding a margin keeps important elements from being cut off during bulk trimming or looking uneven. In terms of design, margins help create focus and give the eye a break. They also provide the reader with a place to take notes or hold the document. Dramatic margins also add to the visual appeal of a designed piece.
Safe Area: You may hear the term Safe Area used when designing for print. This area is safe to place your important elements in. Any cutting or folding imperfections do not go past this point. You can use our minimum margin recommendation (1/8″) during File Setup to define this area visually while designing.
1/8" Margin for Most Documents
We recommend adding a minimum of 1/8″ margin to your printed piece. Outside margins measuring less than the recommended 1/8” minimum run the risk of appearing uneven when trimmed in bulk.
For booklet design, add more space to the inside margin (near the fold) than the top, bottom and outside margin. This will ensure the main content appears centered despite the page fold.
Extra Inside Margin for Books
Add more space to the inside margin (near the fold) than the top, bottom and outside margin. This will ensure the main content appears centered despite the page fold.
Some people call this same area “Gutter” this can be misleading during File Setup. In Indesign, “Gutter” is the area between columns. Make sure you are adding your extra space to the Inside Margin.
3/8" Margin for Envelopes
Full Color, Process Color and Spot Color envelopes require a 3/8“ clear margin at the top of the envelope for the press to grip the envelope.
Envelope designs requiring full bleed on all sides have to be printed on larger flat sheets that are then converted into envelopes afterwards, so please specify this when placing your order as both prices and turnaround are greater.
Templates
Templates are available for almost any item you can print with us, and each one shows the recommended minimum margin and bleed in relation to trim or die lines.
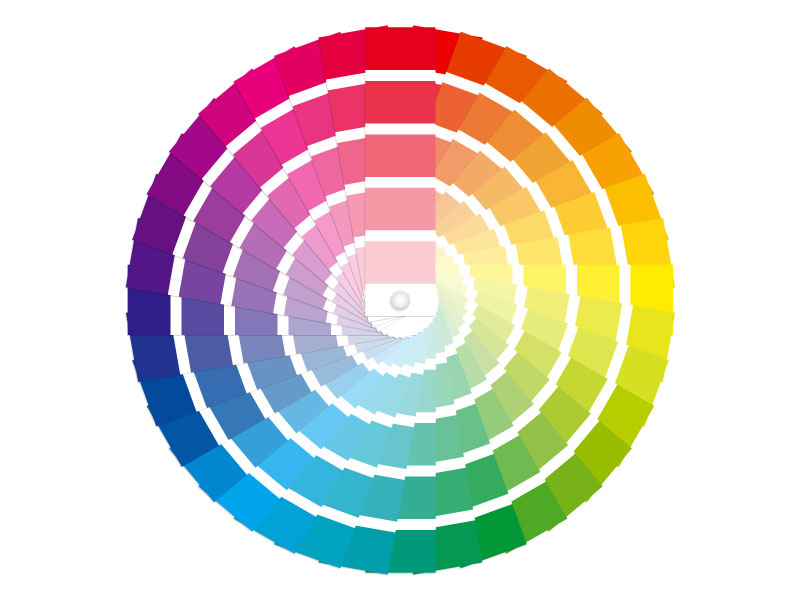
4. Color Palette
The printing process is based on four colors of ink: Cyan, Magenta, Yellow and Black (CMYK). Each color is added separately as the paper passes through the press. This is why you may hear it referred to as a Four Color Process or Four Color Printing. Also why you may see your printer refer to a file that will be printed on each side as 4/4. Meaning, four inks on the front and four on the back. A job to be printed only on the front would be 4/0, etc.
When designing, you need to make sure you are using CMYK Color during four specific times: New Document Setup, Swatches and Color Palettes, Embedding Photos and Artwork, during PDF Export.
What happens when you send art as RGB instead of CMYK?
Printing presses only understand color in terms of CMYK ink percentages. RGB images store the color information by how much light to use. Since printers don’t understand color this way, anything RGB will be automatically converted to the closest CMYK match. Some colors in the RGB Spectrum cannot be reached with ink. In order to make sure you know exactly what your job will look like, design only in the CMYK color mode.
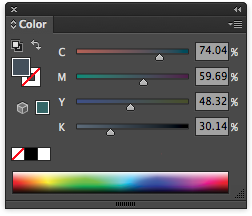
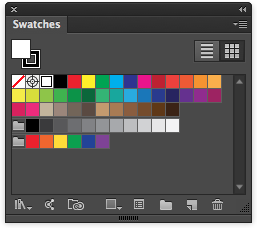
CMYK Color
Each color in the printing process is produced by a special blend of the four inks: Cyan, Magenta, Yellow and Black. It is a subtractive process, white from the paper is subtracted as dots of ink are added to it.
Make sure you design using the right Color Panel and Swatch Libraries. If you begin working with the wrong Color Panel, Color Guide, or Swatch Library, you may be looking at colors in the RGB color spectrum that can’t be reproduced by the CMYK color process.
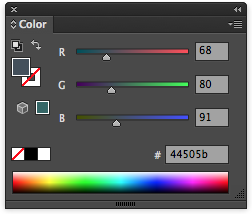
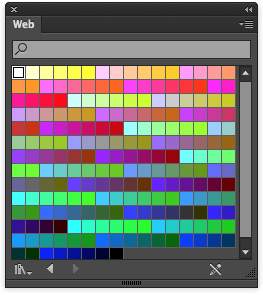
RGB Color
Web based images have an RGB color mode. Monitors display color by using Red, Green and Blue light. It is an additive process, when all three lights are combined you get white light. RGB can reproduce a wider range of colors than what can be reached using inks. *The Web Color Palette is much larger than the palette for print. Many of these colors are unable to be reproduced by ink.
PANTONE + Spot Colors
Many brands have specific PANTONE Colors they like to use. Consult this guide to learn more about using PANTONE Colors and Spot Colors.
5. PANTONE® & Spot Colors
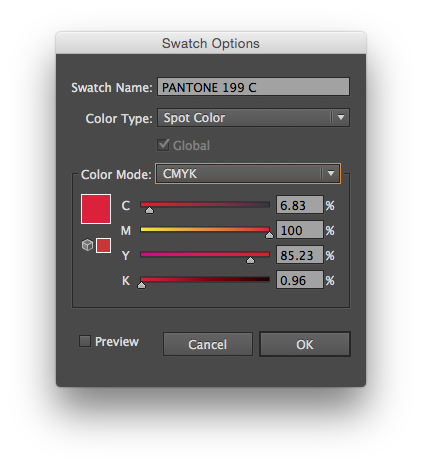
Naming Spot Colors
For spot color jobs, use PANTONE® PMS colors only. Avoid spot color names like “Red” or “Color 1” and “Color 2.” Using the actual PANTONE® color name will help us identify the ink color you wish to use.
PANTONE® 199 C tells us you want to use Pantone’s PMS 199 ink on Coated paper.
Avoid Duplicate PMS Names
Stick to one PANTONE® palette to choose your spot colors from. Switching between different PANTONE® palettes (Coated, Uncoated, etc.) can result in multiple PANTONE® names being used for the same color. When we get your file, plates will be made according to each color used in your file. Using the same color with multiple names can result in the output of extra plates.
Example: PMS 300 C and PMS 300 U are the same color, but they are used on different types of paper (C = Coated, U = Uncoated). Using both of these in the same file will generate two different plates.
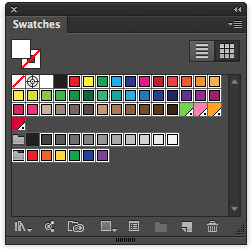
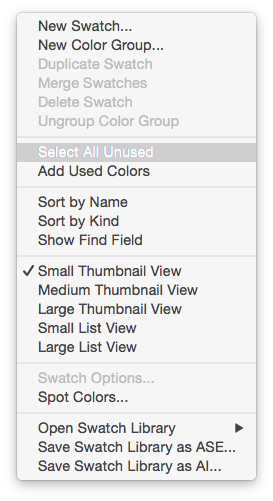
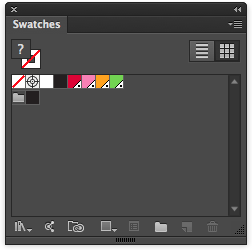
Checking Active Colors and Removing Unused or Duplicate Swatches
Go to the pulldown menu on the top right of the Swatches palette
Navigate to “Select Unused“
Drag the selected color swatches to the trash in the bottom right
What is left will be all of the active colors in your document
Check to make sure you don’t have any duplicate colors
Overprint Issues
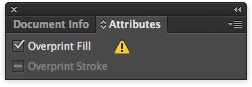
The most common problem we encounter with overprinting is white type set to overprint on color backgrounds. It basically disappears. The same effect can be seen by applying the Multiply effect to white type over a color background.
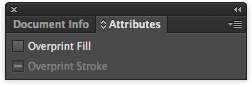
Check your Attributes window to make sure the Fill or Stroke is NOT set to overprint
Select your white text
Go to Window > Attributes
Check to make sure the box labeled “Overprint” is NOT checked
CMYK and/or RGB Colors or Images used in Spot Color Jobs
You cannot use CMYK or RGB images, or elements, in spot color jobs. They separate into multiple colors that have nothing to do with the PMS inks intended for your printout. Clear your palette of anything but Black and your chosen Pantone colors, and use only monotones, duotones or tritones with PMS colors.
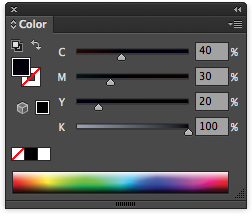
Black vs Rich Black
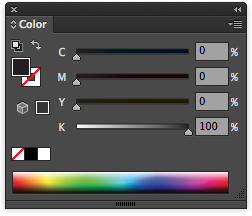
100% Black
Rich Black
100% Black
Small, multi-color type can be difficult to register over a large sheet on the press, and may even present a color halo effect. We recommend setting small type in 100% Black, especially in Photoshop.
Rich Black
Rich black should be used to create rich looking backgrounds, large black accent areas and large headline type. Our recommended mix for rich black is 40% Cyan, 30% Magenta, 20% Yellow and 100% Black (40,30,20,100). Use this to avoid excess ink coverage and associated problems.
Best Practice is to avoid using Rich Black for small type
7. Resolution
Our presses print 200 line screen (dots per inch). That means 200 dots of colored ink are on each inch of your printed piece. To ensure your images appear crisp it is important to make sure they are saved with at least this resolution. During the Prepress process, files are checked for resolution. Anything less than 150dpi will have to be sent back, resulting in a delayed turnaround time.
High Resolution
Low Resolution
High Resolution
If you are creating supporting graphics in Photoshop, make sure you have created it to be the size it will be printed and with a resolution of 200ppi and the size is equal to or greater than the final printed size. Set the color mode to CMYK.
A high resolution image stretched beyond its original size will also result in a low resolution image.
Low Resolution
Usually, low resolution images are downloaded from the internet. Screens only need an image with 72 dots (pixels) per inch to look good. 72 ppi images at 100%, such as those appearing on or copied from websites, are not acceptable. When purchasing Stock Photos, select a size and resolution equal to or greater than the size needed in your document.
Photos taken with digital cameras may be 72 ppi, but as long as they are at least 4 times larger than the final printed size they can still be perfectly acceptable when reduced.
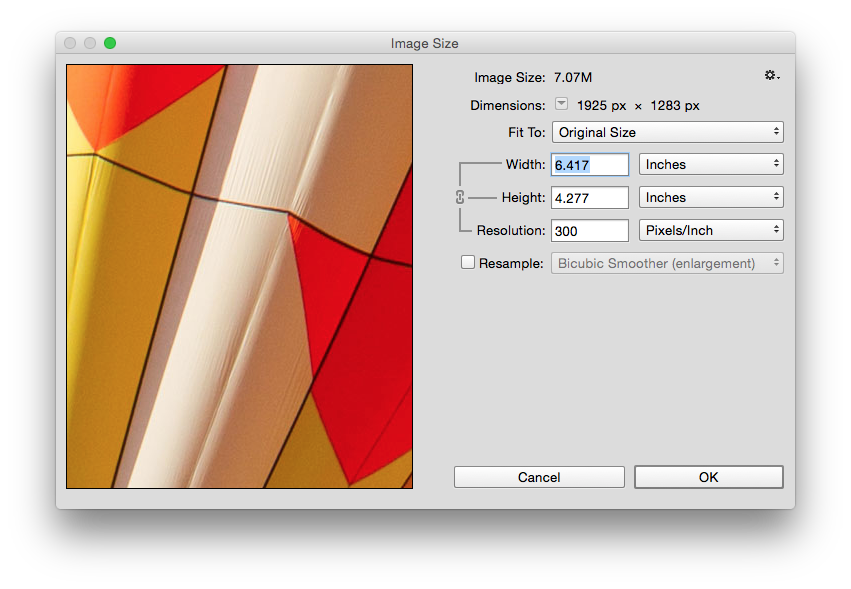
Checking Resolution
You can check image size in Photoshop by going to Image > Image Size
8. Folding
Folds can be a make or break deal when it comes to your print job. An inaccurate fold can also slow down your turn-around time if we have to send the file back to you. A measurement as small as 1/16″ can make a huge difference. For example: panel sizes are different on a standard trifold brochure than a comparably sized Z-fold brochure. For this reason, we ask you download and use our templates.
Our Template Library
We have built a huge library of templates to assist you in laying out or double-checking files for accurate folding. To avoid any folding problems, please select the template best suited for your job. There are six different file formats to choose from. Most brochures have separate templates for each side. Be sure to delete the Template Layer before you save.
If you can’t find the fold you need in our library, let us know and we will send you a custom template.
The main things you need to get right when designing your booklet are the correct page size, correct page number, and the usual basics when designing for print (adding bleed, using CMYK colors, exporting your PDF correctly, etc.)
We recommend using InDesign for designing all booklets, publications, catalogs, magazines, etc.
Select a Number of Pages that are a multiple of four for stitched booklets, and a number divisible by two for coil bound or loose leaf books.
Page Count
The total number of pages in any stitched booklet must be divisible by 4, Coil or Loose Leaf booklet page counts need to be divisible by 2. This is due to what we call a signature. A signature is a group of designed pages that are printed on both sides of a sheet of paper. The paper is then folded and cut to fit the finished size.
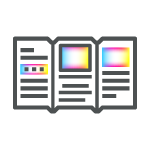
Booklet Pages: Multiples of Four
An 8.5 x 11 booklet is actually several 11 x 17 sheets folded in half and stapled together. Each 11 x 17 page represents 4 pages total. Two sheets equal 8 pages, three sheets equal 12 pages, etc.
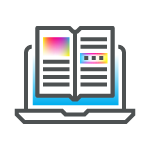
Coil Bound Books – Multiple of 2
Pages for Coil bound or loose leaf books are printed front and back on single sheets, trimmed, and then the coil or other binding is added. Page count for these only need to be divisible by two.
Cover Pages
Often, the cover of the book is printed on a thicker stock than the inside pages of the booklet. There is no need to create a separate file for your cover. Just make sure your Account Exec knows what you would like the cover to be printed on.
Keep in mind that simply having a cover adds four pages to the count, the first two pages and the last two pages:
Outside Front Cover
Inside Front Cover
Inside Back Cover
Outside Back Cover
Include Blank Pages
Place blank pages in your document as needed so the total number of pages in your file equals the total number of pages in the finished, printed booklet. This applies to both stitched and loose-leaf booklets.
If you have a loose-leaf booklet that is printed only on the front of each sheet you can avoid setting up blank pages for each backsides, just let you Account Executive know.
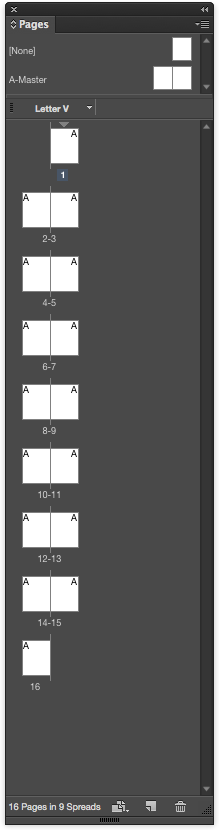
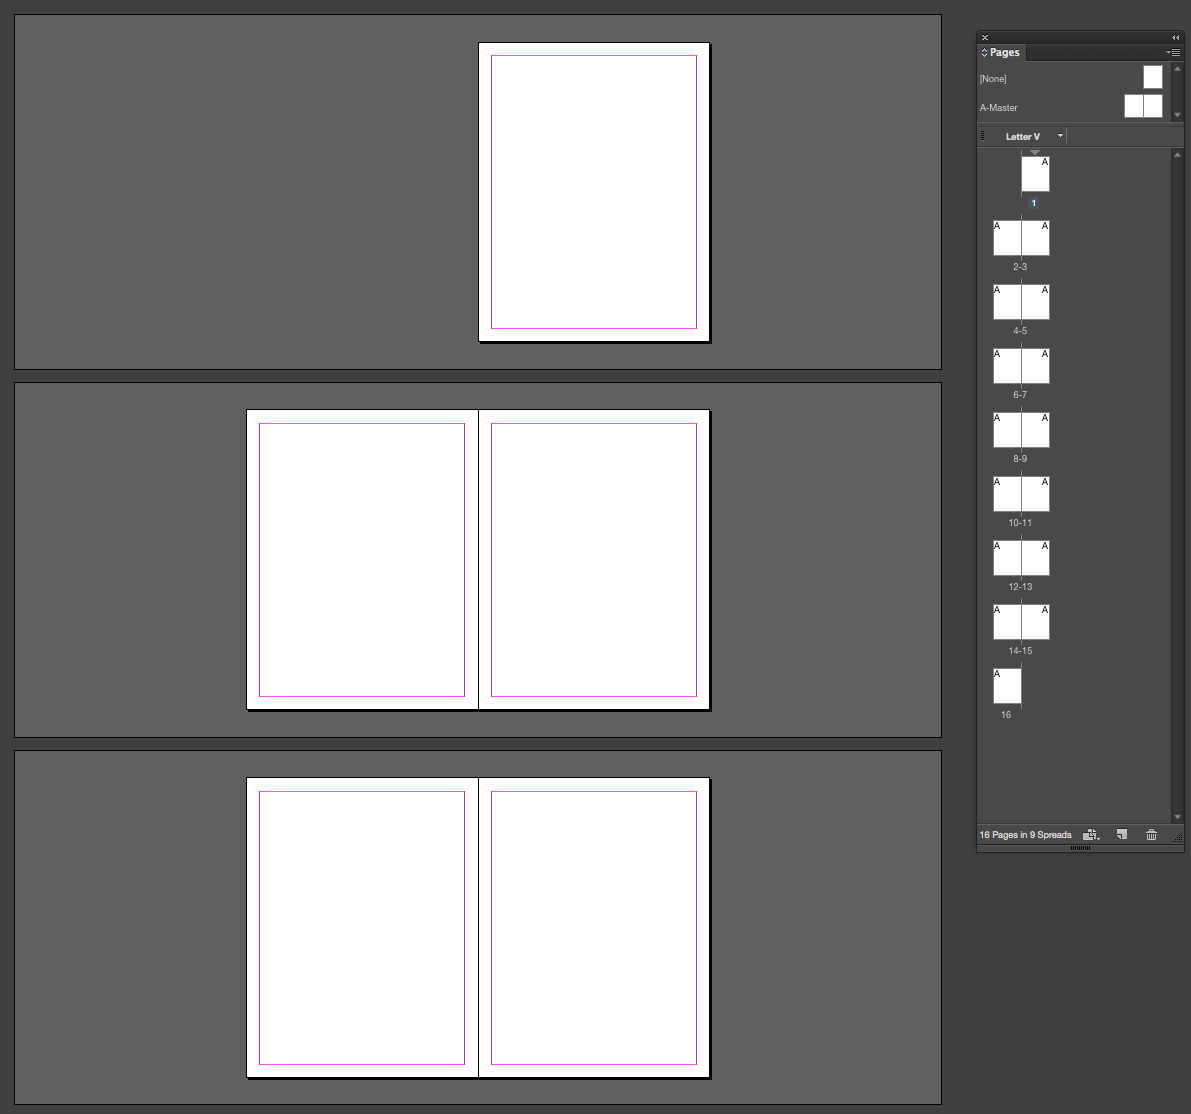
This allows you to design your pages in spreads with side by side pages.
Design in Reader Spreads
Spreads: A spread is two booklet pages side by side.
Reader Spreads
When you are designing your booklet select “Facing Pages” in the New Document dialog box. This allows you to design each page beside the page it will appear by when the booklet is open. This is called a Reader Spread because it is in the order the reader will see it.
This is how we want you to design and send your booklet file to us. It is easy and does not require any extra steps during file setup.
Printer Spreads
If you have ever taken apart a stitched booklet you probably noticed that the pages have to be in a very specific order on each sheet and do not appear in their actual order until all of the sheets have been folded back together. What you are seeing is called a Printer Spread.
You don’t have to worry about designing your booklet this way, in fact, we ask that you don’t. When we receive your print ready PDF we have a program that will automatically reorder each of your pages into Printer Spreads. This makes things much easier on you and eliminates potential confusion on both ends.
Saving Your Booklet for Print
In addition to our basic requirements, you also need to make sure the PDF is exported as Pages rather than Spreads. In Reader Spread order.
Save your Indesign Document
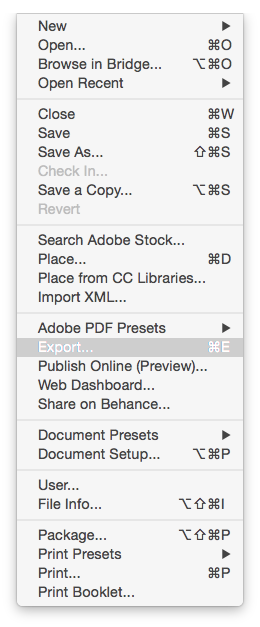
Go to File > Export > and name your booklet file
Select Adobe PDF (Print) from the Format dropdown menu > press Save
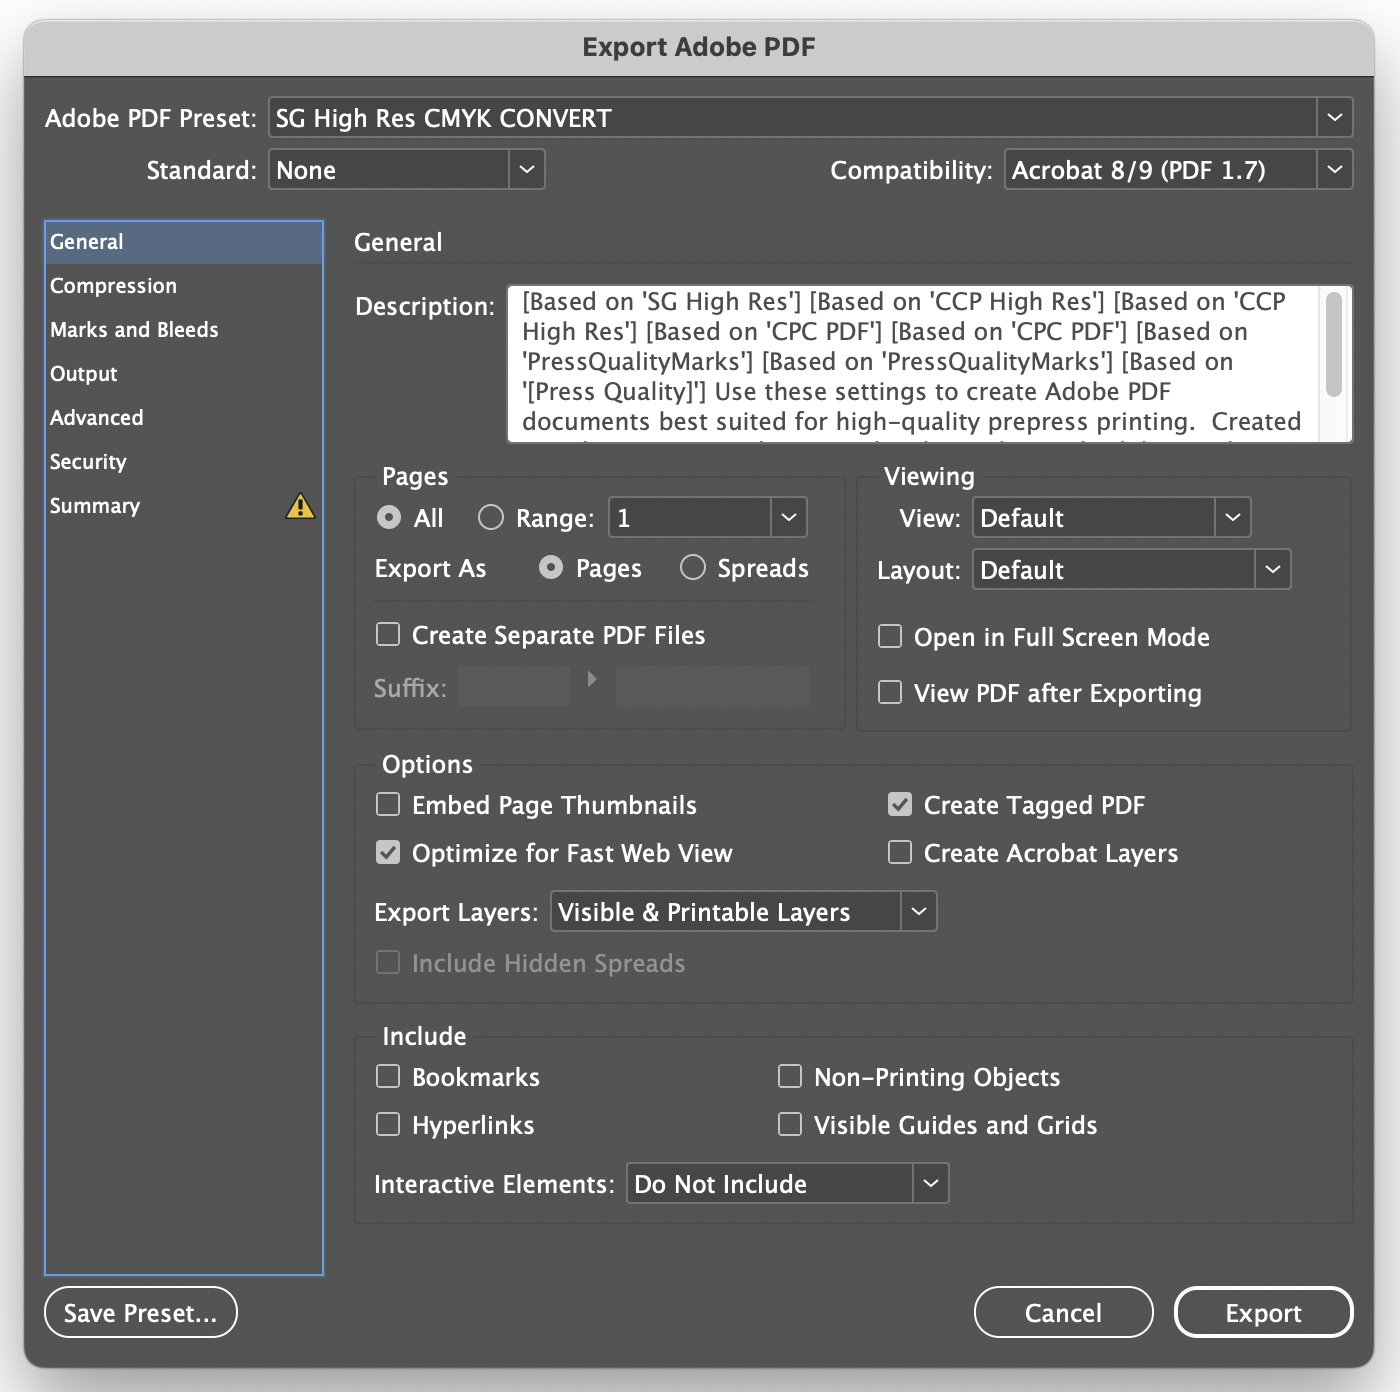
In the “Export Adobe PDF” dialog box go to General
in the “Pages” section select “All” and “Pages“
Make sure all other Print Ready PDF requirements are checked before finishing the export.
This will be the Finished Size of your booklet after it has been folded, stitched, and trimmed.
We recommend nothing less than 1/8″ (.125 inches) on all print projects, however, booklets benefit from adding larger margin than this.
Designer Tip: Most designers prefer larger margins, sometimes up to two inches depending on the page size. This gives the reader space to hold the booklet, and leaves room to add headers.
Inside Margin: Booklets do not lay flat like a single sheet of paper does. Adding a slightly larger amount for the Inside Margin beside the fold will help to ensure all margins appear even when it is open. If you decide to do this, make sure the link box is not selected. This will let you set different increments for each margin.
If you would like to design a Multiple Page Document in Illustrator, make sure each page has its own Artboard. (we recommend using it mainly for designing the front and back of a document, anything more is easier in Indesign)
Go to File > New Document > select the Number of Artboards you need
Leave at least an inch between Artboard
Add the rest of your settings as usual
Do not place multiple pages on the same Artboard, this will not save a Print Ready PDF correctly.
Saving Your Booklet For Print
Make sure you are saving your Booklet File correctly for print. Install our SG High Res PDF Preset and use it when exporting your pdf.
10. Saving Print Ready PDF
You may have noticed we talk about Print Ready PDFs quite a bit. Saving your document for print is one of the most crucial steps of the design process. The following are steps to manually saving a perfect Print Ready PDF.
Skip this guide and save time by downloading our SG High Res PDF Preset. This will quickly and automatically save your file with the right settings every time.
Select Adobe PDF (print) from the Format dropdown menu
Press Save and wait for the Export Adobe PDF dialog box to appear
To Start in Illustrator
Go to File > Save As
Type in your desired File Name
Select Adobe PDF (pdf) from the Format dropdown menu
Press Save and wait for the Export Adobe PDF dialog box to appear
General
Pages: All, Pages
Viewing: Default, Default
Options: Optimize for Fast Web View
Create Tagged PDF
Export Layers “Visible & Printable Layers”
Interactive Elements: “Do Not Include”
Compression
Compressing and downsampling the Images and Art in your file can significantly reduce the size of a PDF file with little or no loss of detail and precision. If no compression is used the PDF file can be exceedingly large. This will cause longer downloading times and could make sending the file to us difficult.
Color Images
Bicubic Downsampling to 300ppi
or images above 300ppi
Compression: JPEG
Image Quality: Maximum
Grayscale Images:
Bicubic Downsampling to 300ppi
or images above 300ppi
Compression: JPEG
Image Quality: Maximum
Monochrome Images
Bicubic Downsampling to 1200ppi
or images above 1800ppi
Compression: Zip
Other Settings
Compress Text and Line Art
Clip Image Data to Frames
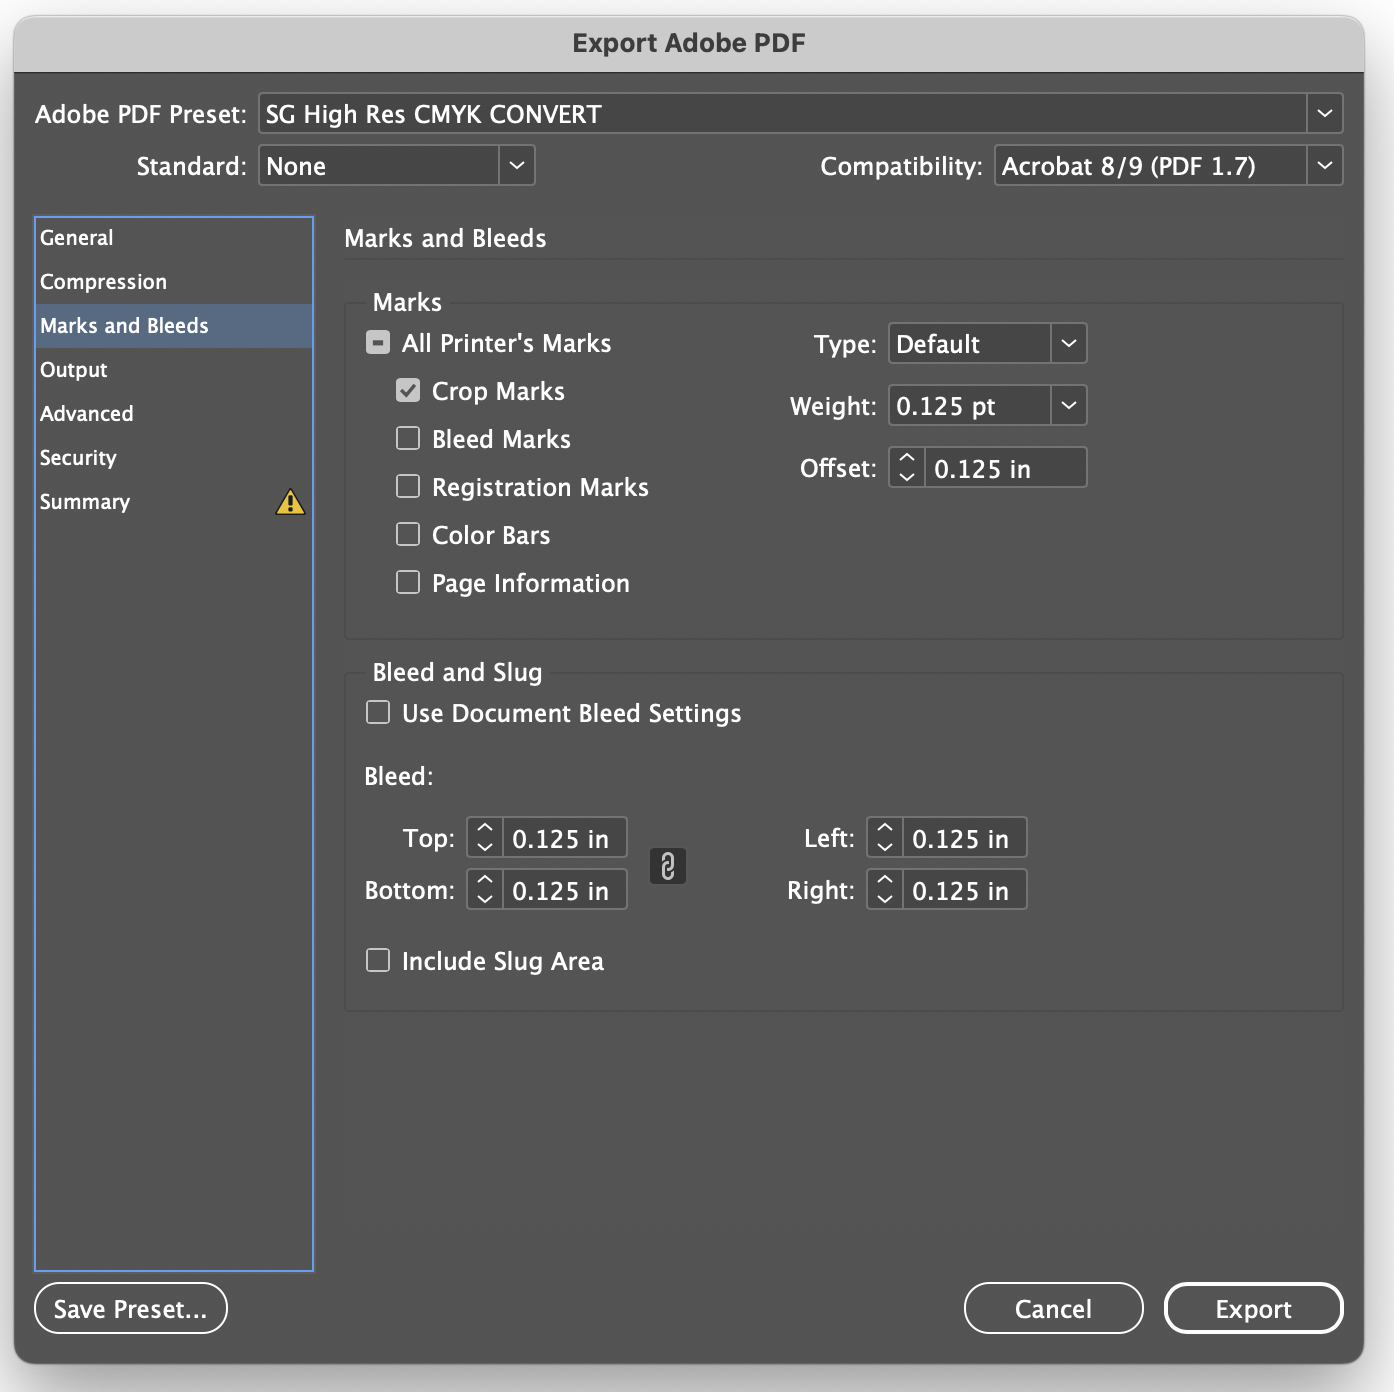
Marks and Bleeds
Marks
We prefer an 1/8″ Bleed Area added to all documents and crop marks beginning at the end of the bleed margin to prevent under trimming.
Only Select: Crop Marks
Choose “Default” from the Type dropdown menu
Select .125pt from the Weight dropdown menu
Enter .125" beside Offset
Be sure to uncheck all unneeded marks/information. (color bars, registration marks, and page information included). These are not needed. If the project is small enough all of this extra page information can push the document up and cause it to print off center.
None of the Presets that come with Adobe Creative Suite have bleed settings established. Even if you select the “Use Document Bleed Settings” but have a document without a bleed setting built in then you will still have no bleed on your PDF. Adobe CS also has Crop Marks offset at .0833″ this interferes with our preferred Bleed Area.
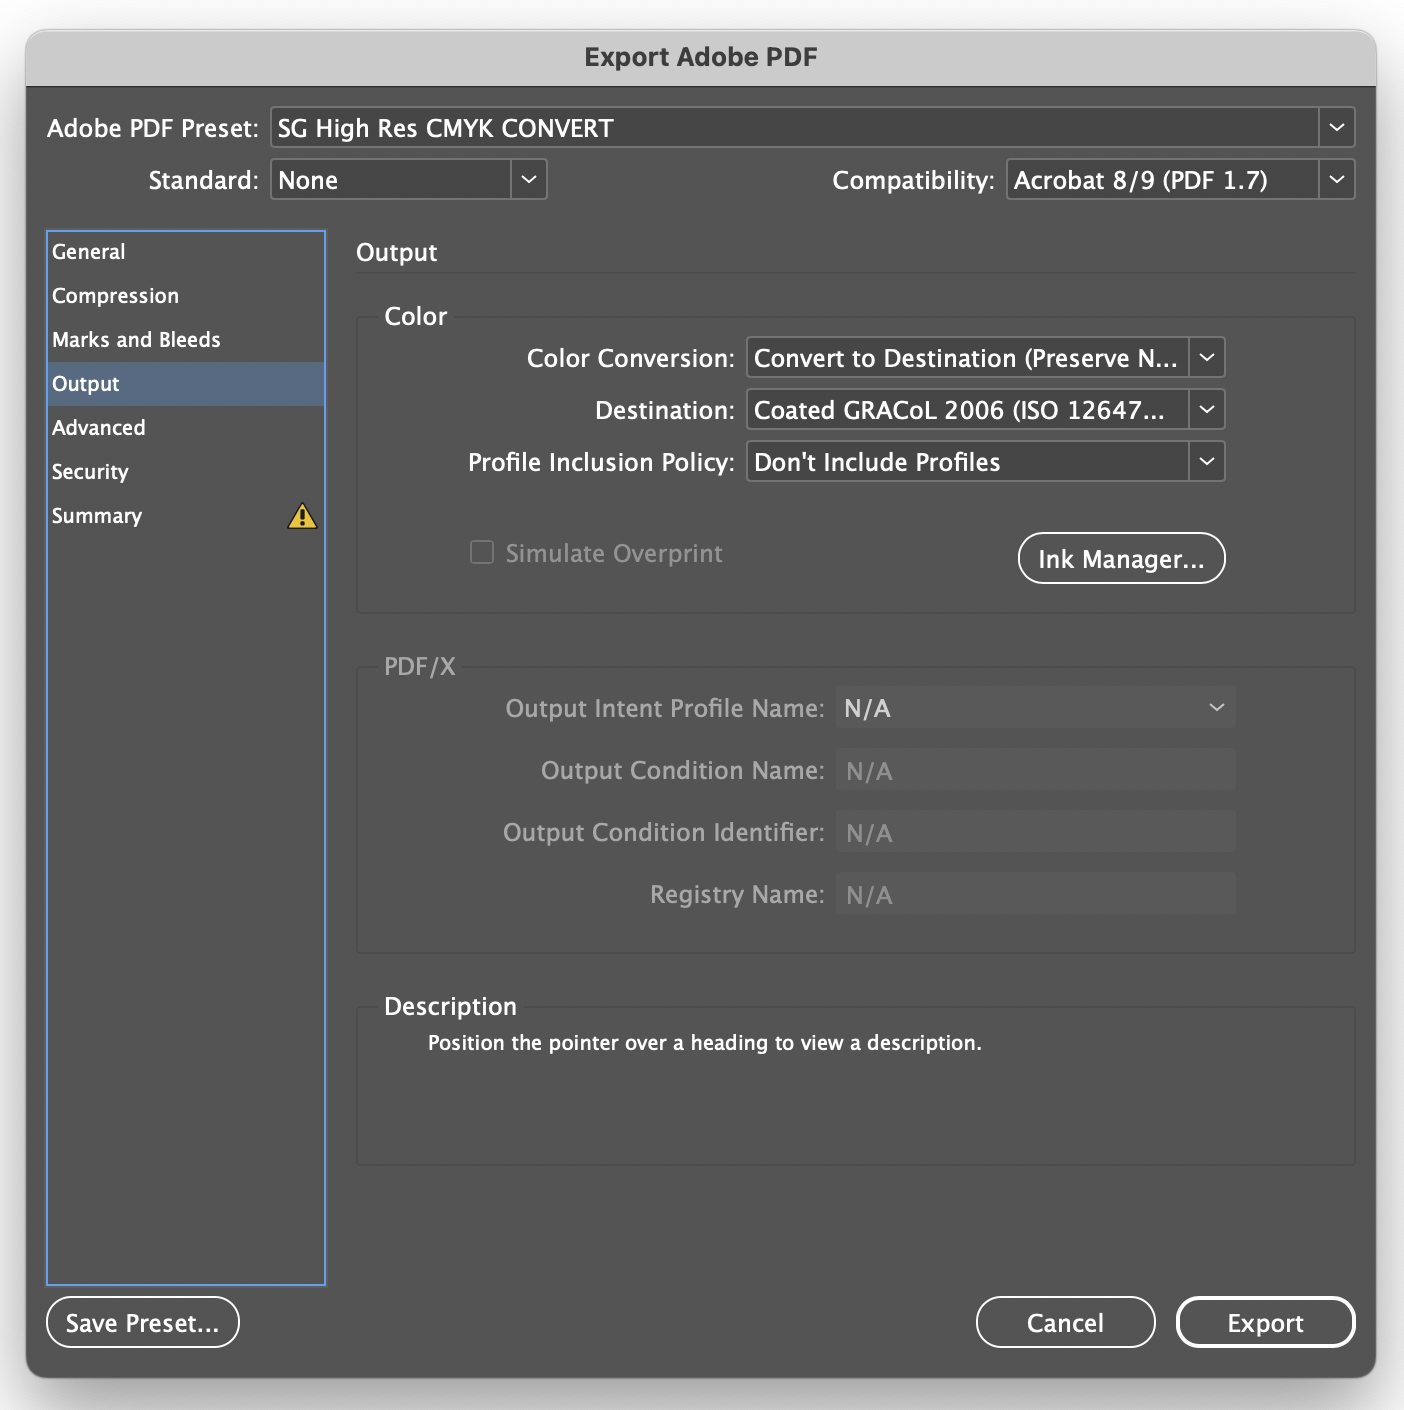
Output Settings
Color Conversion: Convert to Destination (Preserve Numbers)
Profile Inclusion Policy: Don’t Include Profiles
Output settings from the Adobe PDF “Press Quality Preset” uses “Convert to Destination (Preserve Numbers)” for the Color Conversion. This means anything that is RGB/LAB will get converted to this colorspace up front. We believe color management is key and prefer to use this setting. The “Destination” should be set to “GRACoL 2006” or GRACoL 2013” to insure you are aiming for our CRPC. The “Policy Inclusion Profile” can remain as “Don’t Include Profiles.”
11. Download Our PDF Presets
The easiest way to export a Print Ready PDF is by letting our PDF Preset do the work for you. Start by choosing which Adobe application you would like to install it through. (You only have to install it in one application to make it available in all of your Adobe Creative Suite Programs.)
Use our PDF Preset instead of any default Adobe PDF Presets (the most common used in printing is a Press Quality PDF). The Adobe Presets will not save bleed, convert color correctly, or place crop marks in the right spot.
SG High Res Settings
During File Setup always make your Document Size equal to what size you want your final print to be (Trim Size). Example: To design an 8.5″x11″ letterhead in Illustrator, make your document 8.5″x11″.
You can send us your files by email or by uploading directly to your sales rep. We recommend compressing files before sending. We accept Zip or StuffIt files. Compression protects your data and reduces the size of the files you are sending. If you are sending multiple files, place them in a folder and then compress the entire folder before sending
Email
Best for single or multiple files under 20 MB (total size). Email is ideal for business cards, postcards, flyers and forms.
*We recommend compressing files to protect your data and reduce their size for transfer. Multiple files can be placed in a folder before compression.
Find your Sales Rep from the list and click the upload icon
Drag and drop your files
If you are sending a folder with multiple files, please ZIP the folder and then drag and drop the ZIP file
Please type any notes and/or information pertaining to the files you are uploading
Click send and your Sales Rep will be notified by email when your file arrives.
Mailing or Shipping Files
We also accept files on CDs, DVDs, USB thumb drives or flash drives. You are welcome to send your files via USPS, FedEX or UPS. When mailing or shipping files, please notify your sales rep, and if possible supply them with a tracking number.